Aaanyway...we're going to be taking off to California for Christmas soon and I decided to make my kids some travel neck pillows to help keep them comfortable for the loooong car ride. Yes. We're driving. I know, we must be nuts. Please say a prayer for us.
yes, she's still in pajamas. That's how we roll around here!
I had a hard time finding a good tutorial online, so I thought I would walk you through how I made mine. It's a very straight forward pattern and took maybe 30 minutes to make, with the most time consuming parts being cutting and stuffing (and of course pinning - I hate pinning!)
Materials needed:
- Fabric of your choice. I used quilting cotton on top and minkee on the bottom - hence the pinning.
- polyfil - or stuffing of your choice
- pins
- thread
- scissors
- needle for hand sewing opening shut
- sewing machine
- chopstick or knitting needle for stuffing and poking
Here's how I made my pattern. I made the back part thinner so it wouldn't push my kids heads forward.
After you make your pattern and cut it out, cut two pieces from your fabric.
Pin your two pieces together all the way around, right sides facing. Be sure to leave a gap for turning on one of the straight ends. I like to mark the opening with two pins on either side so I don't forget as I'm sewing along.
Sew your pieces together with a 1/2 inch seam allowance, making sure to remove the pins as you go. I like to sew the outside edge first, then the inside circle and finish with the straight ends.
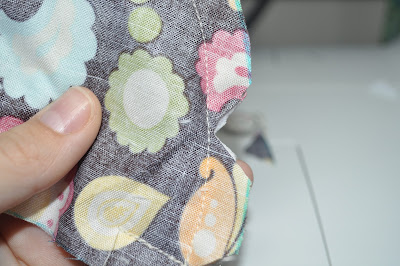
Once you've sewn all the way around, trim your corners and seam allowances to reduce bulk. Also, snip the inside circle and notch the outside to make everything lay nice and flat without puckering. Be careful not to snip through your stitches. That would be bad. I may or may not speak from experience.
After you're done snipping, it's time to turn it right side out through the opening that you left.
Gently poke out your corners with a chopstick or knitting needle.
Here's what we have so far - an empty shell all ready to be stuffed.
Ok, time to stuff it! You'll want to use small pieces of stuffing to keep it from getting lumpy. Use your chopstick or the back end of your knitting needle to cram it all the way down into the corners. Stuff it nice and firm so it really provides good support for your precious child's neck.
Once you have it nice and firm, hand stitch it closed with your preferred stitch. I like to use a ladder stitch for a nice clean finish. I'm a bad blogger and forgot to take a photo of this step. Shame shame!
Look at that! You're done. Sit back and admire your handy work. :)
Finished dimensions - 9 x 9 with 3.5 inch diameter neck opening.
Let me know if you try this pattern and how it turns out! Also, be sure to let me know if you have any questions or if anything is unclear. Happy Sewing! :)
Oh yeah, and apologies for the different fabrics used. I forgot to take some photos along the way and filled in with the second one I made. :)
ETA: I feel the need to add that this pattern is for personal use only and is not to be sold or used to make things to be sold. Thank you for respecting that. :)
ETA: I feel the need to add that this pattern is for personal use only and is not to be sold or used to make things to be sold. Thank you for respecting that. :)


1 comment:
Perfect timing! We are driving from Salt Lake to Washington for Christmas. Time to go home and whip a few up for my girls. Thanks for the tutorial!
Post a Comment